Visit Kaufman Roofing

Search This Blog

Translate

Tuesday, November 22, 2016

Hanging Holiday Lights

Tis’ the season for snow-capped roofs, cozy nights by the fireside and holiday festivities. During the winter season, many homeowners will look to their roof for some DIY hanging of holiday lights. Here are a few things to keep in mind before the merriest season becomes more like a scene worthy of the name of Clark Griswold.

Preparation
Make sure that you check all of the lights before you get on the roof. If there are individual bulbs that will not light up, consider replacing the whole string as opposed to the individual unit. This will ensure that other bulbs will not go out in the process of replacing the single bulb. Know what type of lights you would like to use and on what parts of the roof. Icicle lights should be strung closer together, too much distance and their special, charming effect will be lost. Traditional LED incandescent lights should be spaced farther apart as their cozy effect already emits a homey quality.


Map Your Route
Have a plan before you get out a ladder and lights. In the long run, this will save not only time but headache as well. Knowing which color and type of lights you are going to put on what parts of your roof will make for a swift and easy install.


Installation
Do not set your lights too far back on the roof. Not only will it diminish the effects of the lights but extending beyond your arm’s reach could open you up to possible safety issues. We at Kaufman Roofing suggest using all-in-one clips to secure the lights to your roofing system. Using nails or staples could possibly damage the roof or, if nothing else, void the manufacturer’s warranty.

Safety

Hands down the most important aspect of any roofing job is the attention to safety, especially during the winter months. The most common roofing-related injury seen by doctors occurs during the installation and take-down of holiday lights, and most could’ve been easily avoided by taking a few tips into consideration. Be vigilant in paying attention to the weather and only install when it is at its best. Use the buddy system! No matter the roofing project, always work with another person, this way, everyone’s safety is the #1 priority. Know how to properly operate your ladder as well as the safest way to climb up and down. Make sure the feet of the ladder are anti-slip and are properly stabilized against the ground. Always secure your ladder to the roof, not the gutters, to ensure slipping will not occur. This measure will also protect your gutter system from unintentional damage. Do not place your ladder on icy or wet patches of ground. Even a wet patch can become dangerously slippery in a matter of minutes.

~ Meghan Beck


Monday, July 18, 2016

DIY Roof Safety Tips

10 Safety Tips When Tackling DIY Roofing Projects

DIY roofing projects can extend the life of your current roofing system as well as give you the satisfaction of completing your home’s needs on your schedule. However, if the proper precautions are not taken, you could be hurting in more ways than one. Following these 10 safety tips, you could avoid most roof related accidents.


1. Buddy System
Working with one or more partners will not only provide assistance with the project but also allow you to safely meet your goals knowing that others are active in the project and aware of the surroundings.

2. Appropriate Attire
To prevent slipping and ensure proper stability, wear shoes with good support and rubberized soles. Also, taking precautions against sun exposure will keep you healthy and ready to tackle your next project.

3. Map It Out
Create a plan of action before stepping on the roof; knowing what, how, where, and materials needed will make the project less stressful, run smoother and much easier. You’ll thank yourself later for the extra planning and strategic thinking.

4. Surrounding Environment
Before you begin any roofing project, it is important to check the building’s surroundings to ensure that no children, pets or pedestrians are around the hazardous zone. Electrical wires must also be taken into careful consideration, as they are sometimes hidden and can cause irreparable damage.

5. Weather Warnings
Watch the weather a few days in advance to maximize the project’s potential. Working on a dry roof will not only assist in completing the project sooner but a dry roof is a safe roof. Roofing injuries increase tenfold when a damp environment is involved.

6. Preparation of the Roof
One small detail that makes the biggest difference in the success of your project is making sure the roof is clean and free of debris. Take care to sweep the entire surface and watch for signs of bigger roof issues, such as cracked or buckling shingles.

7. Tool and Material Education
Properly familiarize yourself with the tools and materials you will beusing for the project; doing this simple and easy step will help into prevent any unnecessary injuries.

8. Ladders
Injuries associated with ladders are one of the most commonly reported roofing accidents. For this reason, it is extremely important that careful precautions are taken to avoid situations that may provoke issues with safety. Make sure you use a ladder designed for your specific project and with weight limits that are appropriate for the project at hand. Additionally, securing your ladder to the gutter spikes, when applicable, will provide a strong and steady support.

9. Safety Harness and Foot Brackets
Once on the roof, maintaining your stability is the key to safely and successfully completing a project. Foot brackets, although seen as a nuisance, can easily be created from a wood board and a few nails, creating a more secure environment than before. However, when dealing with a steeply slanted roof or if you are new to the DIY roofing scene, a safety harness is highly recommended and can be affordably purchased at your local home improvement store.

10. Know your limits
Listen and watch for the signs; don’t demand more than your body can offer. Recognize your body’s limits and don’t try to push them as overworking yourself might cause more harm than good. Take breaks often when working in the sun to avoid heat stress, and be sure to drink plenty of water. A healthy, well prepared body is ready to face the demands of a DIY roofing project anyone would be proud of. 

~ Meghan Beck


Thursday, June 16, 2016

Maintaining Your Gutters - Know How

What You Need to Know About Maintaining Your Gutters

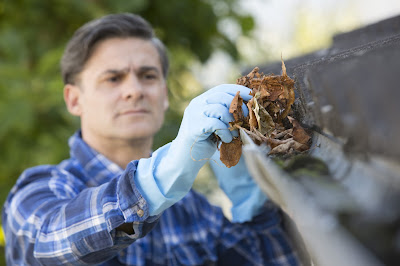
Functioning as a vital component of a long-lasting roofing system, gutters and downspouts serve as the main system in leading water away from your home, which could prevent many issues associated with water buildup. However, not maintaining a proper gutter system could expose your house to unnecessary risks such as roofing leaks, mold and mildew, foundation issues and more. One of the easiest ways to prevent such issues is by periodically checking your gutter system for clogged debris and other unwanted materials. If your gutters are backed up and the issue is not addressed immediately, this backup could lead to a complete roof replacement regardless of the roof’s age or condition.

Gutters should be cleaned at least twice a year to prevent water from backing up and debris from clogging the downspout. However, depending on the location of your home, they may need to be cleaned more often. Regular inspections and cleaning of gutters can elongate the life of your roofing system, and cause you less stress and worry. Although a smaller detail in the grand scheme of a roofing system, gutters can actually save you thousands of dollars in repair or replacement of your roof. Simple cleaning of gutters can prevent any unnecessary damages to your home’s foundation, roofing system, and walls or windows. Inspecting the gutters for damage associated with weather can assist in preventing any further damage to your roofing system.

It is also important to inspect your gutters for signs of other problems such as insect or rodent infestations. Clogged or poorly functioning gutters can quickly lead to pest infestations, such as mosquitos, termites and carpenter ants, and can lead to issues with your roof that may cause pests such as mice to nest in your attic. Applying a quick fix solution to get rid of the problem will only yield short-term results. To insure long-term success, it is important to identify the real issue and address it with a hands-on approach.

No matter your roofing system, gutters are an important aspect that should not be overlooked. Doing so may cause more harm than good, and it may cost you more than just a financial inconvenience; it’ll cost you piece of mind.

~ Meghan Beck

Tuesday, May 31, 2016

When Do I Need a New Roof?


Do I need a new roof?
When is the right time to replace your existing roof? One of the most common questions regarding a roofing system is how do I know when to replace my roof. If inspected regularly, you could avoid lengthy, expensive roofing projects resulting from small avoidable problems. The best way to catch any potential roofing issues is to inspect your roof at least twice a year. You don’t necessarily need a licensed contractor to inspect your roof, however one is highly recommended when problems do arise to correct the problem. For Minnesota residents, or residents of areas where cold temperatures and heavy precipitation (such as snow or rain) are common and make up at least 3 or more months of the year, inspecting your roof before and after every winter will help in preventing weather related issues.

The most important factor to take into account is the age of the roof; how old is your current roof? Depending on your type of roof, you may need to replace your roof more or less frequently. For example, the average asphalt roofing system lasts 20-25 years while slate or tile shingles could last anywhere from 50-200 years. Whatever your type of roof, it is important to recognize the signs for a potential replacement in order to avoid creating any structural issues with the house.

Shingles can tell you many things, namely when it is necessary to replace the roofing system. If the shingles are cracked, buckling or curling, losing granules, or completely missing, it may be time to replace your roof. Cracked shingles are typically a result of wind damage, while buckling is caused by repetitive exposure to direct sunlight over a longer period of time. Shingles lose more granules towards the end of their life cycle causing darker areas, which can sometimes affect gutters or leave undesirable residue around the house.

A common concern with asphalt roofing that typically causes worry is the presence of moss on the roof; have no fear, however, because it is nothing more than an aesthetic issue and renders itself completely harmless. However, it is encouraged to avoid resolving the issue without the assistance of a licensed contractor as there could be more damaged caused to the roof than necessary.

Other less common issues may arise such as: water damage, sagging roof, or light shining into the attic. These are all signs that a licensed contractor should be contacted to discuss potential repair options. In addition to roof inspections, gutters should be cleaned at least once a year to prevent water from backing up. If not addressed immediately, this backup could lead to a complete roof replacement regardless of the roof’s age.

~ Meghan Beck